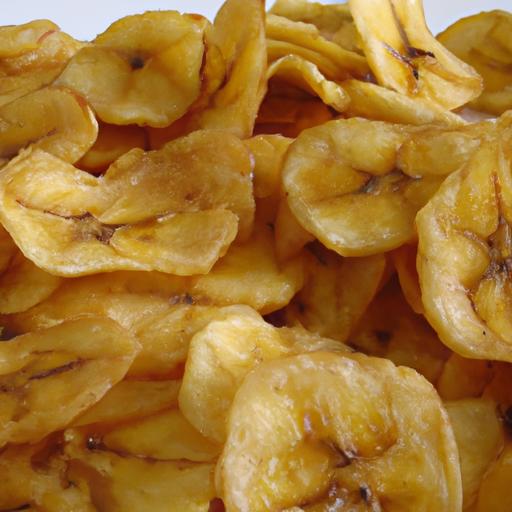
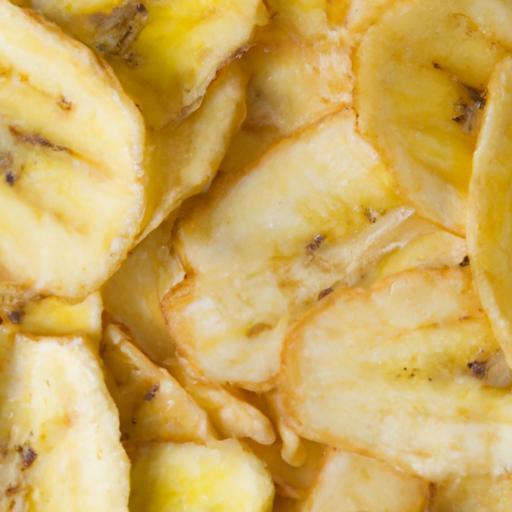
There’s something undeniably satisfying about the crisp snap of a perfectly made banana chip-a delightful fusion of sweet, subtle banana flavor and irresistibly crunchy texture. Whether enjoyed as a wholesome snack on the go or sprinkled over yoru morning smoothie bowl,homemade banana chips bring a fresh twist to a classic treat. In this article, we’ll unravel the simple secrets behind crafting your own crunchy delights right in your kitchen.From selecting the ripest bananas to mastering the drying process, get ready to embark on a tasty adventure that transforms humble fruit slices into crispy, golden bites of bliss.
crunchy Delight: How to Make Homemade Banana Chips Easily begins with selecting the best bananas to ensure that every chip bursts with ideal crispiness. For the ultimate crunch, choose firm, unripe bananas-commonly labeled as green or slightly yellow with minimal brown spots.These starchy bananas have lower sugar content and less moisture, wich helps your chips crisp up beautifully without turning soggy.
Choosing the perfect Bananas for Ideal Crispiness
When hunting for bananas, aim for the plantain or green banana variety if available, as they carry the right texture and sturdiness for slicing thinly and drying out properly. Avoid overly ripe bananas; their higher sugar content makes chips prone to burning and sogginess. firmness is key: press gently to check-bananas slightly tender to the touch will yield crisp yet tender chips.
Mastering the Slicing Technique for Evenly Cooked Chips
Precision in slicing guarantees evenly cooked chips that are consistently crunchy.Using a mandoline slicer set to 1/8 inch thickness or a very sharp knife, slice the bananas uniformly. Thinner slices yield crispier chips, but if too thin, they may burn quickly or crumble.Hold the banana steady and slice straight across to preserve shape, avoiding uneven edges that cook inconsistently.
Optimal Drying Methods to Achieve the Perfect Crunch
There are several methods for drying your banana slices, each delivering distinct results. For an extra crisp finish and natural sweetness, baking them in a low-temperature oven (around 200°F/93°C) for 1.5 to 2 hours is ideal. Arrange the slices on parchment paper so they don’t overlap and flip them halfway through. Alternatively, using a food dehydrator can produce excellent results by drawing out moisture evenly without overheating.
Flavor infusions and Seasoning Tips to Elevate Your Banana Chips
Elevate your banana chips from simple to sensational with subtle flavor infusions and seasoning blends. Before drying, toss your slices in a bowl with a drizzle of coconut oil or olive oil for a delicate sheen and enhanced mouthfeel. Sprinkle on a pinch of sea salt to balance natural sweetness or experiment with ground cinnamon, cayenne pepper, or smoked paprika for a savory twist. For a touch of indulgence, toss with a bit of brown sugar and vanilla extract for a sweet-spiced mood.
Prep and Cook Time
- Prep Time: 15 minutes
- Cook Time: 1.5-2 hours (oven) or 6-8 hours (dehydrator)
Yield
Yields approximately 3 cups of banana chips, perfect for snacking or gifting.
Difficulty Level
Easy – perfect for beginner to intermediate kitchen enthusiasts.
Ingredients
- 3 large firm green bananas, peeled
- 1 tablespoon coconut oil or olive oil
- ½ teaspoon sea salt
- Optional: ½ teaspoon ground cinnamon, ¼ teaspoon cayenne pepper, or 1 tablespoon brown sugar
- optional: 1 teaspoon vanilla extract (for sweet variation)
Instructions
- Preheat your oven to 200°F (93°C) or prepare your dehydrator according to manufacturer instructions.
- Slice the bananas into 1/8 inch even rounds using a mandoline or sharp knife for uniform chips.
- in a mixing bowl, lightly toss the banana slices with coconut oil and your preferred seasoning blend. Spread them in a single layer on a parchment-lined baking sheet, ensuring slices do not overlap.
- Bake for 1.5 to 2 hours, flipping the banana slices halfway through to promote even drying. For dehydrating, arrange slices and dry for 6-8 hours until crisp.
- Remove from oven or dehydrator and let cool wholly on a wire rack-it’s during cooling that chips achieve maximum crunchiness.
- Store airtight in a cool, dry place to maintain crispness for up to two weeks.
Tips for Success
- if chips turn chewy, they may need additional drying time. Be patient-slow drying creates superior crunch.
- For vibrant flavor, apply seasonings right after slicing so the oil carries spices into the chips.
- If you don’t have a mandoline,slice slowly and carefully with a sharp chef’s knife to keep thickness even.
- Make ahead and gift your banana chips in glass jars with custom labels for a delightful homemade snack option.
- Swap coconut oil for avocado oil for a more neutral flavor or experiment with smoked sea salt for an irresistible smoky crunch.
Serving Suggestions
Serve banana chips alongside tropical fruit bowls or crunchy salads for a fun textural contrast. pair with nut butters, yogurt, or drizzle lightly with honey for a naturally sweet snack. For savory lovers, these chips make a fantastic companion to guacamole or your favorite salsa. Garnish with finely chopped fresh mint or toasted coconut flakes to enhance presentation and aroma.
| Nutrient | Per Serving (½ cup) |
|---|---|
| Calories | 130 |
| Protein | 1 g |
| Carbohydrates | 34 g |
| fat | 4 g |
Explore more healthy and easy homemade snacks to complement your crunchy treats. For deeper insight into banana varieties and nutritional benefits, visit the Fresh Fruit Portal.

Q&A
Q&A: Crunchy Delight – How to Make Homemade Banana Chips Easily
Q1: Why should I make banana chips at home rather of buying them from the store?
A1: Homemade banana chips are fresher, free from preservatives, and you can customize the flavor and crunch to your liking. Plus, making them at home means no hidden sugars or artificial ingredients-just pure, natural goodness!
Q2: What kind of bananas work best for banana chips?
A2: The ideal bananas are firm and slightly underripe, often called green or plantain bananas. They hold their shape better and provide that perfect crispy texture once dried or baked, unlike overly ripe bananas which turn mushy.
Q3: How do I slice bananas thinly and evenly?
A3: Use a sharp knife or a mandoline slicer for uniform thin slices. Consistent thickness ensures even cooking and crispiness. aim for about 1/8 inch (3 mm) slices-thin enough to get crunchy, but not so thin they burn.
Q4: What’s the best method to achieve that perfect crunch?
A4: You can either bake,fry,or dehydrate banana slices. Baking at a low temperature (around 200°F/90°C) for 1-2 hours is a healthy and easy method. Frying gives a crispier chip but uses more oil. Dehydrating maximizes shelf life and nutrition without any oil.
Q5: Should I soak the banana slices before cooking?
A5: Soaking the slices in lemon juice or lime water for 5-10 minutes prevents browning and adds a slight tangy flavor. It also helps keep the chips visually appealing and fresh-looking.
Q6: Can I add flavors or spices to my banana chips?
A6: Absolutely! Sprinkle cinnamon, chili powder, salt, or even a drizzle of honey before baking or frying. Sweet, savory, or spicy – the flavor possibilities are endless for your crunchy delight.
Q7: how do I store homemade banana chips to keep them crispy?
A7: Store them in an airtight container at room temperature, away from moisture. Adding a small packet of silica gel or a pinch of rice can help absorb residual moisture,preserving that satisfying crunch.
Q8: Are banana chips a healthy snack?
A8: When homemade with minimal oil and no added sugars, banana chips are a nutritious snack packed with potassium, fiber, and vitamins. They offer a natural energy boost and a guilt-free crunch compared to many processed snacks.
Q9: Can I use this recipe to make chips from other fruits?
A9: Yes! The technique works well for plantains, apples, pears, and even sweet potatoes. Just adjust the cooking time based on moisture content and slice thickness to achieve that perfect crunch.Q10: What’s the number one tip for beginner banana chip makers?
A10: Patience! Low and slow cooking is key-rushing the process with high heat will leave you with burnt edges and chewy centers. Embrace the wait, and your crunchy delight will be worth every minute.
In Summary
Whether you’re craving a quick snack or looking to add a crispy twist to your breakfast routine, homemade banana chips offer a delightful crunch that’s as satisfying as it is simple to make. with just a few ingredients and a bit of patience, you can transform ripe bananas into golden, crispy treats that elevate any snack time. so next time you’re tempted by store-bought options, remember: the perfect batch of crunchy banana chips is just a kitchen away-fresh, flavorful, and free from preservatives. Happy snacking!